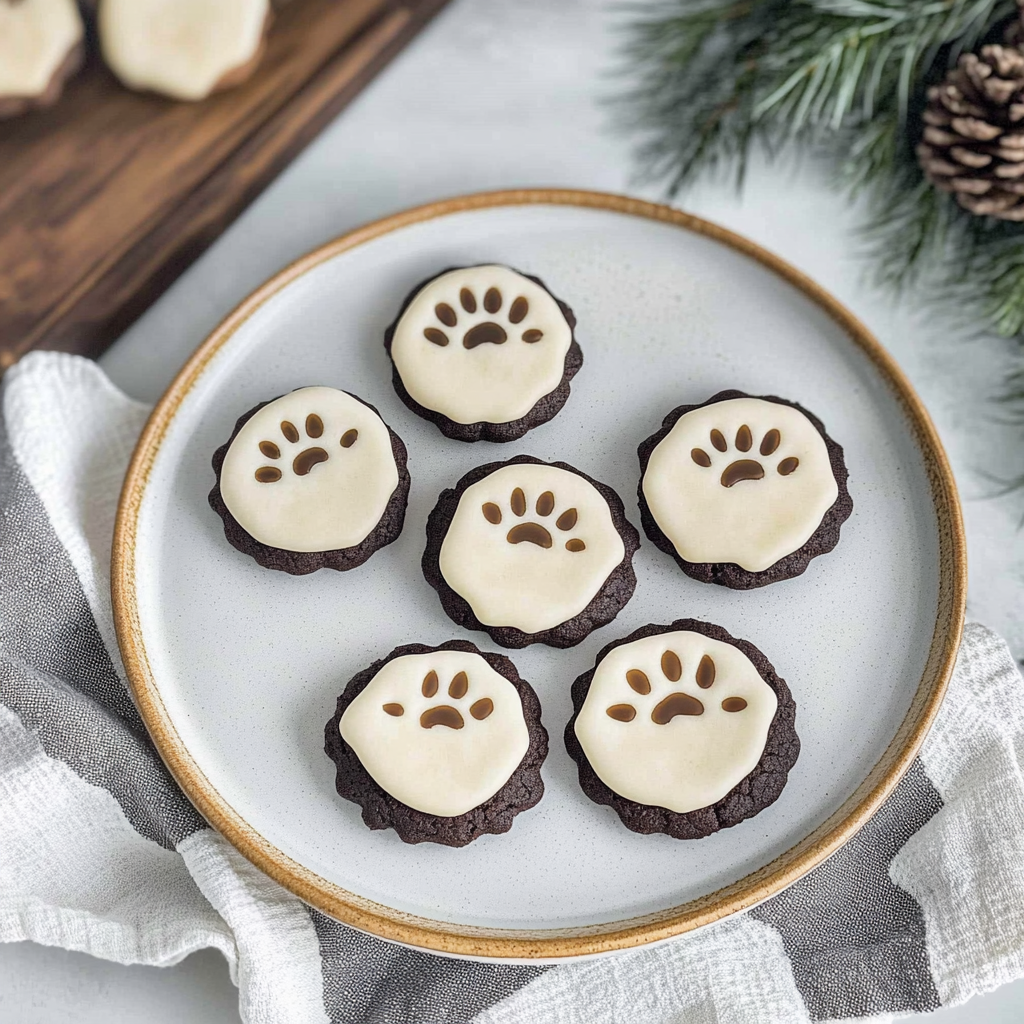
Polar Bear Paw Print Cookies are like little bites of winter magic, evoking the crisp chill of a snowy day and the warmth of sweet indulgence. Picture this: soft, chewy cookies adorned with chocolate paw prints, calling to your inner child while making you believe you’re in a cozy cabin surrounded by snow-capped mountains.
These cookies are perfect for holiday gatherings or family bake-offs. They not only add a dash of whimsy to your dessert table but also bring back fond memories—like the time I tried to build a snowman and ended up looking more like a snowball than anything else. Get ready to wow your friends and family with these irresistible treats that guarantee smiles all around!
Why You'll Love This Recipe
- These Polar Bear Paw Print Cookies are incredibly easy to make, even for baking novices.
- Their rich flavor combines sweetness and a hint of chocolate that’ll have taste buds dancing.
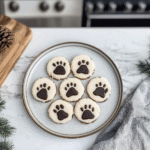
- The adorable paw print design makes them visually appealing, perfect for festive occasions or just because!
- Plus, they’re versatile enough for any cookie platter you create.
Ingredients for Polar Bear Paw Print Cookies
Here’s what you’ll need to make this delicious dish:
- All-Purpose Flour: This is the backbone of our cookie. Use unbleached flour for a richer flavor and texture.
- Baking Soda: Helps the cookies rise and achieve that soft, chewy texture we all love.
- Salt: A little salt enhances flavors—don’t skip it!
- Unsalted Butter: Use room temperature butter for easy mixing. It adds richness to the cookie.
- Sugar: Granulated sugar sweetens the cookies while giving them that lovely golden color as they bake.
- Brown Sugar: Brown sugar adds moisture and depth to the flavor profile—think caramel vibes!
- Eggs: Two large eggs bind everything together and help create that chewy texture.
- Vanilla Extract: For that warm, comforting aroma that fills your kitchen as they bake.
- Chocolate Chips: Semi-sweet chocolate chips work best for those delightful paw prints on top!
The full ingredients list, including measurements, is provided in the recipe card directly below.
How to Make Polar Bear Paw Print Cookies
Follow these simple steps to prepare this delicious dish:
Step 1: Preheat Your Oven
Preheat your oven to 350°F (175°C). Line two baking sheets with parchment paper—your cookies will thank you later!
Step 2: Mix Dry Ingredients
In a medium bowl, whisk together the all-purpose flour, baking soda, and salt. Set this mix aside while we get into the buttery goodness.
Step 3: Cream Butter and Sugars
In a large mixing bowl, cream together the unsalted butter, granulated sugar, and brown sugar until light and fluffy. You want it airy—not like my last attempt at soufflé!
Step 4: Add Eggs and Vanilla
Mix in the eggs one at a time followed by vanilla extract until everything is well combined. It should smell incredible by now!
Step 5: Combine Wet and Dry Ingredients
Gradually add your dry mixture into the wet ingredients until just combined. Don’t overmix! We’re making cookies here, not bread.
Step 6: Fold in Chocolate Chips
Gently fold in those heavenly chocolate chips until evenly distributed throughout your dough. Now comes the fun part—shaping them!
To shape each cookie into adorable paws, scoop out some dough (about two tablespoons) and flatten it slightly on the prepared baking sheet. Use two smaller chocolate chips to create “toes” at one end of each cookie—voilà! You’ve got yourself some polar bear paws.
Finally, bake these beauties in your preheated oven for about 10-12 minutes or until they’re golden around the edges but still soft in the middle. Transfer them onto cooling racks before devouring them—if you can resist that long!
Serve them warm with milk or hot cocoa for an unforgettable treat everyone will enjoy!
You Must Know
- These Polar Bear Paw Print Cookies are not just adorable; they bring a fun twist to any holiday gathering.
- Perfect for baking with kids, they spark creativity and laughter in the kitchen.
- Their whimsical design makes them a hit at parties, bringing joy and sweetness to each bite.
Perfecting the Cooking Process
To create your Polar Bear Paw Print Cookies, start by mixing the dough, roll it into balls, and chill for 30 minutes. While chilling, preheat your oven so everything flows smoothly. Bake until golden brown, then let cool before decorating for that paw print effect.
Add Your Touch
Get creative with your Polar Bear Paw Print Cookies! Swap out chocolate chips for butterscotch or peanut butter chips. Add crushed nuts or colorful sprinkles to the dough for extra flair. Personalize each cookie to match your taste buds and impress your guests.
Storing & Reheating
Store your Polar Bear Paw Print Cookies in an airtight container at room temperature for up to a week. For longer storage, freeze them in a single layer and transfer to a bag once solid. No need to reheat; enjoy them right from the freezer!
Chef's Helpful Tips
- When making Polar Bear Paw Print Cookies, use room temperature butter for smooth mixing.
- Don’t skip chilling the dough; it helps with shape retention when baking.
- Experiment with different toppings like melted white chocolate for a snowy effect!
My niece once exclaimed these cookies were “the best thing ever!” as she licked her fingers clean after devouring three of them. Moments like that remind me why I love baking—it’s all about sharing joy through food!
FAQs:
What are Polar Bear Paw Print Cookies?
Polar Bear Paw Print Cookies are delightful treats that resemble the paw prints of a polar bear. These cookies are often made with sugar cookie dough and decorated with chocolate to create the signature paw print design. They are perfect for winter-themed parties or holiday gatherings. The combination of sweet cookie and rich chocolate makes them an irresistible choice for both kids and adults. Making these cookies can be a fun activity, especially during the colder months when you want something cozy to enjoy.
How do I store Polar Bear Paw Print Cookies?
To keep your Polar Bear Paw Print Cookies fresh, store them in an airtight container at room temperature. This helps maintain their softness and flavor for several days. If you need to store them for a longer period, consider freezing them. Place the cooled cookies in a single layer on a baking sheet and freeze until solid, then transfer them to a freezer-safe bag or container. When you want to enjoy them again, simply thaw at room temperature for a few hours before serving.
Can I customize Polar Bear Paw Print Cookies?
Absolutely! You can customize Polar Bear Paw Print Cookies in various ways. For instance, try adding different flavors to your sugar cookie dough, like vanilla or almond extract, to enhance the taste. Additionally, you can use colored icing or edible glitter to make your cookies more festive. Feel free to experiment with different types of chocolate for the paw prints as well. This allows you to create unique versions that suit your personal preferences or special occasions.
Are Polar Bear Paw Print Cookies suitable for special diets?
When it comes to dietary restrictions, it’s essential to modify ingredients thoughtfully. Traditional Polar Bear Paw Print Cookies contain flour, sugar, and butter, which may not fit gluten-free or vegan diets. However, you can easily adapt the recipe using gluten-free flour blends and plant-based butter substitutes. Be sure to check the chocolate used for paw prints as well—opt for dairy-free chocolate if you’re making vegan versions. With some adjustments, everyone can enjoy these adorable cookies!
Conclusion for Polar Bear Paw Print Cookies:
In summary, Polar Bear Paw Print Cookies are a delightful treat that brings joy during winter festivities. Their charming appearance coupled with delicious flavors makes them perfect for any celebration. Storing these cookies properly ensures they remain fresh and enjoyable over time. Plus, customization options allow you to tailor them according to dietary needs or personal tastes. Whether baking alone or with family, these cookies provide a fun way to embrace the holiday spirit while indulging in something sweet!
Polar Bear Paw Print Cookies
- Prep Time: 15 minutes
- Cook Time: 12 minutes
- Total Time: 27 minutes
- Yield: About 24 cookies 1x
- Category: Dessert
- Method: Baking
- Cuisine: American
Description
Delight in the whimsical charm of Polar Bear Paw Print Cookies, soft and chewy treats adorned with chocolate for a fun winter-inspired dessert.
Ingredients
- 2 ½ cups all-purpose flour
- 1 tsp baking soda
- ½ tsp salt
- 1 cup unsalted butter (room temperature)
- ¾ cup granulated sugar
- ¾ cup brown sugar
- 2 large eggs
- 2 tsp vanilla extract
- 1 cup semi-sweet chocolate chips
Instructions
- Preheat Your Oven: Preheat your oven to 350°F (175°C) and line two baking sheets with parchment paper.
- Mix Dry Ingredients: In a medium bowl, whisk together the flour, baking soda, and salt. Set aside.
- Cream Butter and Sugars: In a large mixing bowl, cream together the butter, granulated sugar, and brown sugar until light and fluffy.
- Add Eggs and Vanilla: Mix in the eggs one at a time followed by the vanilla extract until well combined.
- Combine Wet and Dry Ingredients: Gradually add the dry mixture into the wet ingredients until just combined. Avoid overmixing.
- Fold in Chocolate Chips: Gently fold in the chocolate chips until evenly distributed throughout the dough.
- Shape Cookies: Scoop out about two tablespoons of dough and flatten slightly on the prepared baking sheet. Use two smaller chocolate chips for 'toes' at one end of each cookie.
- Bake: Bake for about 10-12 minutes or until golden around the edges but still soft in the middle. Let cool on cooling racks before serving.
Nutrition
- Serving Size: 1 cookie
- Calories: 150
- Sugar: 9g
- Sodium: 80mg
- Fat: 7g
- Saturated Fat: 4g
- Unsaturated Fat: 2g
- Trans Fat: 0g
- Carbohydrates: 20g
- Fiber: <1g
- Protein: 2g
- Cholesterol: 20mg
Keywords: Chill your dough for better shape retention while baking. Feel free to substitute chocolate chips with butterscotch or peanut butter chips for a different flavor twist. For added fun, decorate with colorful sprinkles or icing after baking!


Leave a Comment